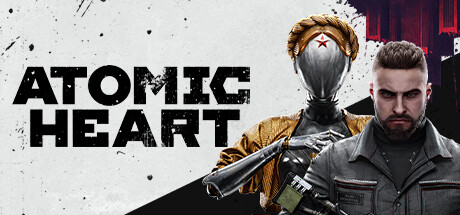
Looting never felt so satisfying. One of the most unique aspects of Atomic Heart is the ability to loot by violently sucking up everything of use—an oddly gratifying feature that sets the tone for the rest of the game. But surviving the robot apocalypse isn’t just about hoarding resources; it’s about smart strategies and making the most of the tools at your disposal. This guide dives into advanced tips and tricks that every player should know.
Navigating the Open World: Survive and Thrive
After three to four hours of gameplay, you’ll unlock the main open-world hub—a sprawling map that demands both caution and strategy. The catch? Every robot you destroy begins repairing almost immediately, creating an endless cycle of combat if you’re not careful.
Interestingly, this mechanic also presents an opportunity. Defeated robots drop valuable resources, which means you can technically farm them by letting them rebuild, killing them again, and collecting double the resources. However, if you’re overwhelmed, the key is to break the cycle—disabling the Hawks can grant you temporary respite.
Hawks are control hubs that oversee cameras and robots in each area. By finding and accessing the control room, you can override these hubs to disable enemies and cameras for about 20 minutes. This window allows you to explore freely, gather resources, and even take down deactivated robots for easy loot.
Dealing with Alarms and Cameras
The surveillance system in Atomic Heart is unforgiving. Getting spotted by a camera triggers a level 2 alarm, which floods the area with aggressive robots. While escaping these alarms is relatively simple—just run until the robots lose sight of you—the smarter play is to disable cameras proactively.
Use shock attacks to temporarily disable cameras or destroy them outright. Doing this before engaging enemies can save you a lot of hassle and resources. When the Hawks are down, cameras and robots won’t just deactivate—they’ll stay offline until the system comes back online. Use this time wisely.
Combat Tips: Mastering Melee and Energy Weapons
When it comes to combat, melee and energy weapons should be your go-to for general encounters. Ammunition can be scarce, especially early on, so conserving bullets for tougher enemies or boss fights is a smart strategy. Energy weapons regenerate over time, and melee weapons don’t break, making them ideal for dealing with the game’s frequent enemy encounters.
For enemies resistant to standard attacks, the polymer abilities provide a versatile alternative. Coating enemies with Polymer Jet amplifies the damage they take from elemental attacks. Combine this with cartridges that add fire, electricity, or ice effects to your weapons, and you can dismantle even the toughest foes.
The Pros and Cons of Stealth
Stealth is technically an option in Atomic Heart, but it’s not without its flaws. Quick-time events make stealth kills cumbersome, and enemy patrols are often unpredictable. The one exception is when you’ve disabled a Hawk relay. In these cases, stealth takedowns become a quick and resource-efficient way to collect materials without triggering alarms.
If you do opt for stealth, focus on disabling cameras first. This reduces the risk of alerts and makes it easier to isolate enemies for silent takedowns. Still, a direct approach with a well-prepared arsenal is often more effective.
Optimizing Your Weapons and Upgrades
Weapon and ability upgrades are crucial for surviving the escalating threats in Atomic Heart. At NORA machines, you can craft new weapons, enhance existing ones, and even dismantle old gear to recover valuable resources. This is especially useful as you progress and unlock blueprints for higher-tier weapons.
Testing Grounds, or Polygons, are a must for serious players. These optional dungeons offer unique weapon upgrades that can drastically alter your combat effectiveness. While the puzzles can be time-consuming, the rewards—such as elemental upgrades and enhanced damage—make it worth the effort.
Choosing the Right Loadout
There’s no single best weapon in Atomic Heart, but a balanced loadout is essential. A powerful melee weapon is non-negotiable due to the number of enemies resistant to bullets. For ranged combat, a combination of a shotgun for close quarters, an assault rifle for bosses, and a pistol for conserving ammo works well.
Energy weapons, particularly the Electro, become invaluable once upgraded. The Electro’s ability to siphon health from enemies and operate without ammo makes it a game-changer in prolonged fights. Prioritize upgrades that boost energy capacity and regeneration to make the most of these weapons.
The Importance of Dismantling and Resource Management
Dismantling unused weapons and upgrades isn’t just about inventory management—it’s a way to reclaim rare resources for future upgrades. Since some blueprints are only available in Testing Grounds, regularly dismantling old gear ensures you always have enough materials to craft the latest upgrades.
Focus on acquiring blueprints for the weapons you actually use and dismantle those you don’t. This approach keeps your inventory lean and maximizes the effectiveness of the resources you collect.
Conclusion: Adapt, Survive, Conquer
In a world overrun by killer robots, survival hinges on your ability to adapt. Mastering the balance between melee, energy, and ranged weapons, optimizing upgrades, and using the environment to your advantage are key strategies for success. The open world of Atomic Heart is relentless, but with these tips, you’ll have everything you need to turn the tide.
Prepare wisely, fight smart, and above all—keep looting.


Leave a comment