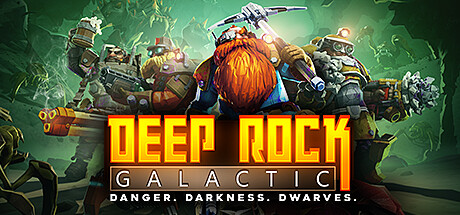
The Gunner class in Deep Rock Galactic is perfect for those who want to be on the front lines, unloading massive firepower into swarms of bugs while offering strong defensive tools for the team. While some may view the Gunner as a straightforward or even “boring” class, there’s far more depth to his role than just holding down the trigger. This guide will cover everything you need to know about the Gunner: his weapons, equipment, best mission types, and tips to maximize your effectiveness on Hoxxes IV.
Understanding the Gunner’s Role
The Gunner is the team’s primary damage dealer and crowd controller. While other classes focus on mobility, support, or terrain manipulation, the Gunner’s job is simple: eliminate threats and keep the team safe.
- Zipline Launcher: Enables quick traversal over gaps and tricky terrain.
- Shield Generator: Provides temporary protection in high-risk situations.
- High-Damage Weapons: Heavy guns capable of sustained fire or explosive damage.
- Reliable Defense: High health pool and shields make him one of the tankiest classes.
With the right setup, the Gunner excels in swarm control, objective defense, and eliminating large threats.
Primary Weapons
The Gunner has three devastating primary weapons, each with unique strengths and playstyles.
1. Lead Storm Powered Minigun
- Pros: High rate of fire, consistent damage output, stun potential.
- Cons: Overheats with continuous use, no reload (draws from one large ammo pool).
- Best For: Holding choke points, clearing large swarms.
The Minigun is a fantastic all-around choice, dealing constant, reliable damage. Be mindful of its heat buildup—firing too long will overheat the gun and cause a temporary jam. Mods like Cold as the Grave help mitigate this issue by cooling the gun with each kill.
Recommended Overclocks:
- Lead Storm – Extreme damage output but at the cost of mobility.
- Burning Hell – Adds fire damage for close-range attacks.
- Exhaust Vectoring – Increased damage at the expense of accuracy.
2. Thunderhead Heavy Autocannon
- Pros: Explosive rounds, area damage, great for armored enemies.
- Cons: Slow rate of fire, weaker against single targets.
- Best For: Missions with high swarm density.
The Autocannon is great for area denial and armor-breaking, but its slower fire rate makes it less effective for precision shots. Overclocks like Big Bertha enhance single-target damage, while Combat Mobility increases movement speed while firing.
Recommended Overclocks:
- Big Bertha – Converts it into a single-target powerhouse.
- Combat Mobility – Greatly increases mobility while using the gun.
- Neurotoxin Payload – Adds poison damage to control swarms.
3. Hurricane Guided Rocket System
- Pros: Guided missiles, pinpoint accuracy, versatile mod choices.
- Cons: Lower ammo count, slower rate of fire.
- Best For: Single-target damage and precision explosive attacks.
The Hurricane Rocket System allows precise targeting and adaptive firing strategies. It shines in missions requiring controlled explosive damage, such as Elimination and Industrial Sabotage.
Recommended Overclocks:
- Plasma Burster Missiles – Devastating damage to single targets.
- Rocket Barrage – Fires rockets at a rapid pace.
- Napalm-Infused Rounds – Adds area-of-effect fire damage.
Secondary Weapons
While not as flashy as the primaries, the Gunner’s secondary weapons provide reliable backup firepower.
1. Bulldog Heavy Revolver
- Pros: High damage, great for weak points, reliable at range.
- Cons: Slow rate of fire, limited ammo.
- Best For: Taking out high-priority enemies from a distance.
Recommended Overclocks:
- Six Shooter – Increases magazine size.
- Elephant Rounds – Extreme stopping power for big targets.
- Neurotoxin Coating – Adds poison effects for extra damage.
2. BRT7 Burst Fire Gun
- Pros: High fire rate, effective against swarms.
- Cons: Less stopping power than the revolver.
- Best For: Clearing weaker enemies and supplementing primary fire.
Recommended Overclocks:
- Micro Flechettes – Higher ammo count for prolonged fights.
- Lead Spray – High close-range burst damage.
- Electro Minelets – Turns bullets into electric traps.
3. ArmsKore Coil Gun
- Pros: Penetrates terrain and enemies, high damage potential.
- Cons: Requires charging, limited shots.
- Best For: Sniping through cover and high-priority target elimination.
Recommended Overclocks:
- The Mole – Boosts penetration and damage through terrain.
- Hellfire – Leaves a burning energy trail for crowd control.
- Re-Atomizer – Spreads elemental effects across enemies.
Grenades
The Gunner has access to powerful grenades suited for different scenarios:
- Sticky Grenade – Strong single-target damage.
- Cluster Grenade – Wide-area damage, great for swarms.
- Incendiary Grenade – Creates a lingering fire effect.
- Lead Burster – A grenade that fires bullets in all directions.
Experiment with each to find what fits your playstyle.
Support Equipment
Shield Generator
The Gunner’s Shield Generator is one of the best defensive tools in the game. It provides a temporary bubble of safety, allowing for safe revives, resupplies, or recovery during intense fights.
- Fear Effect: Most enemies avoid entering the shield.
- Damage Reduction: Players inside take reduced damage.
- Regenerates Shields: Instantly restores personal shields.
Make sure to upgrade duration in the Equipment Terminal, and use it proactively—a shield in your pocket won’t help if you’re already downed!
Zipline Launcher
The Zipline Launcher provides safe traversal over gaps, hazardous terrain, or high ground.
- Great for team mobility.
- Can be used in fights to reposition.
- Not as fast as other traversal tools but offers unique advantages.
Mission Suitability
The Gunner excels in missions requiring sustained firepower and defensive positioning:
- Best for:
- Elimination (Boss fights)
- Industrial Sabotage
- Point Extraction
- Escort Duty
- Decent for:
- Mining Expeditions
- Egg Hunts
- Less suited for:
- On-Site Refining (More mobility-focused missions)
Final Thoughts
The Gunner may seem simple on the surface, but his potential for strategic team support and high-damage outputmakes him invaluable. If you love big guns, explosions, and being the last line of defense, the Gunner is the class for you.
So, grab your minigun, throw down your shield, and remember:
Rock and Stone!


Leave a comment