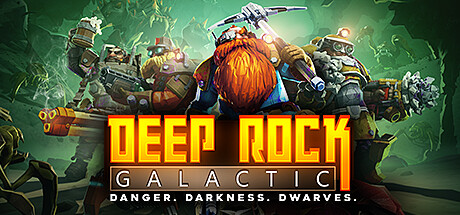
For those stepping into the depths of Deep Rock Galactic (DRG) for the first time, the game can feel overwhelming. With an intricate co-op experience, four unique classes, and a space rig filled with interactive elements, new players—often called greenbeards—may find themselves lost or unsure of their next steps. This guide will help ease that transition, offering short-term and long-term goals, as well as essential gameplay tips that will elevate your mining and combat experience.
Welcome to the Space Rig
Once you complete the tutorial, you’re launched into the space rig—a hub for all your operations. It’s not massive, but the sheer number of terminals and activities can make it confusing at first. Rather than breaking down every aspect, let’s focus on the essentials.
Class Selection and Understanding Roles
Each of the four classes in DRG comes with unique weapons and support tools, defining distinct playstyles. Unlike many games where classes are locked into roles by weaponry, DRG mixes things up with support tools that allow for varied team synergies. Experimenting with each class is encouraged, as teamwork is built around their different abilities.
Missions vs. Assignments: The Key Differences
One of the most common points of confusion is the difference between missions and assignments. While the two words may seem interchangeable, they serve different purposes:
- Missions are individual objectives selected on the map. They provide experience, credits, and crafting materials.
- Assignments consist of multiple missions, unlocking significant content such as new biomes, weapons, cosmetics, and mission types. Think of them as overarching questlines that grant long-term progression.
If you’re just starting, you will automatically have the Conquer Hoxxes assignment active. Completing it should be your first goal, as it unlocks key game features and biomes.
Navigating the Mission Board
The mission board displays a map of Hoxxes IV, highlighting available missions and their biomes. Early on, most biomes will be locked, gradually unlocking as you progress. Your active assignment’s next required mission will be marked by a blinking white diamond—always prioritize this to keep advancing.
Before launching a mission, you’ll also choose your lobby type:
- Public: Open to random players online.
- Private: Limited to invited friends.
- Solo: Play alone with Bosco, your robotic assistant.
For new players, co-op is highly recommended as it enhances the experience and allows you to learn from others.
Hazard Levels: Choosing the Right Difficulty
Each mission has a hazard level—essentially a difficulty setting. Higher hazards yield better rewards but present tougher challenges. For beginners, Hazard 2 is a good starting point before gradually increasing difficulty.
Essential Gameplay Tips
Once underground, the real challenge begins. Here are key survival tips to keep in mind:
1. Mine Nitra – Your Lifeline for Ammo
Nitra is a red mineral found on cave walls and is essential for calling resupply pods. One pod costs 80 Nitra and replenishes ammo. Make it a priority to mine and deposit Nitra, especially on longer missions where running out of ammo can mean certain death.
2. Use the Mule (Molly) Efficiently
Molly serves as your mobile depository for minerals. Players can call her by pressing C (PC), Y (Xbox), or Triangle (PlayStation). If your inventory is full, deposit regularly to ensure team-wide resource availability.
3. The Terrain Scanner and Laser Pointer – Navigational Aids
- The terrain scanner (TAB on PC, View button on controllers) provides an overhead map, helping locate teammates, mission objectives, and unexplored sections of the cave.
- The laser pointer (CTRL on PC, Left Bumper on controllers) allows you to ping locations, mark enemies, and even command Bosco when playing solo.
4. Combat Tips – Weak Points and Prioritizing Threats
Every creature has a weak point—typically glowing or exposed sections. Landing shots on these areas conserves ammo and increases damage output.
Additionally, prioritize high-threat enemies in this order:
- Bulk Detonators
- Menaces
- Acid Spitters
- Wardens
- Cave Leeches
- Grabbers
Staying mobile, backstepping, and jumping during combat will significantly improve survivability, particularly on higher hazards.
5. Teamplay Etiquette – Rock and Stone!
- Stick together! Splitting up increases the chances of being downed by hazards or enemies.
- When using resupply pods, take only one resupply at a time. Always ask before taking a second one.
- Before pressing the extraction button, ensure all teammates are ready.
- Lastly, never forget to press V (PC) or click the analog stick to Rock and Stone! Not doing so will earn you the title of leaf lover—a fate worse than death.
Progression Goals – Short and Long-Term Objectives
Once you grasp the basics, set your sights on progression. Here’s what to aim for:
Short-Term Goals
- Complete the Conquer Hoxxes Assignment to unlock key features.
- Upgrade Weapons and Equipment at the Equipment Terminal. Prioritize support tool upgrades, as they significantly improve survivability.
- Unlock and Assign Perks at the Milestones Terminal, including passive bonuses and active abilities like reviving teammates instantly or taming bugs (yes, you can name them Steve).
- Earn Crafting Resources to enhance your loadout and improve mission efficiency.
Long-Term Goals
- Promote Dwarves – Upon reaching level 25, you can promote a class, unlocking machine events, overclocks, deep dives, and the forge.
- Experiment with Different Classes – Avoid sticking to a single class to keep gameplay fresh and engaging.
- Complete the Season Pass – DRG offers free seasonal content, and earning rewards through gameplay ensures a steady stream of new cosmetics and upgrades.
Final Thoughts
There’s no “right” way to play Deep Rock Galactic, but understanding these fundamentals will smooth the learning curve and enhance your overall experience. Whether mining for rare minerals, battling hostile creatures, or simply enjoying a drink at the Abyss Bar, the heart of the game lies in teamwork and exploration. Play at your own pace, experiment with different classes, and most importantly—
Rock and Stone!


Leave a comment