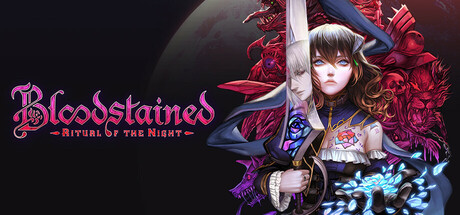
In Bloodstained: Ritual of the Night, shards are your core combat customization system, and choosing the right ones—especially in the early and mid-game—can dramatically ease your journey. This guide focuses on recommending highly effective shards for newer players, breaking them down by stage of the game and explaining their ideal uses. Some of these maintain value even late into the game depending on your style. Let’s dive in.
Early Game Shards
1. Thrashing Tentacle
- Acquired from: First boss
- Use: A heavy-hitting shard that’s perfect for early bosses and slow enemies.
- Why it works: Cast and run—great against mid-stage enemies like the Death Knight due to its solid damage and low mobility requirements.
2. Flame Cannon
- Use: Fires multiple fireballs at once when upgraded.
- Effectiveness: Each ball deals independent damage, making it highly efficient at Rank 7+.
- Best for: General mob clearing and sustained ranged damage.
3. Summon Ghost
- Use: Fires a bouncing ghost that can strike enemies multiple times.
- Why it’s good: Early game damage is solid, and with upgrades, it can do significant multi-hit damage. Great against grouped enemies or narrow areas.
4. Head Flail
- Use: Swings a chain-attached head for strong early AoE damage.
- Reliability: Still useful well into the mid-game depending on build.
5. Splash R
- Use: Launches bouncing projectiles.
- Why it’s good: It does consistent damage from a distance and works well in zones like the Inferno Cave, especially with straight paths or flying enemies.
Familiar Shards
Silver Knight
- Use: Reliable auto-attacking companion with potential for stronger moves.
- Why it’s one of the best: Consistent presence and decent scaling with upgrades.
Carabosse
- Use: A fairy that detects hidden walls and healing items.
- Special utility: Can save your life by healing you in critical moments if equipped with potions.
Mid-Game Power Picks
1. Acid Jet
- Use: Short-range poison spray.
- Why it’s critical: Applies poison damage over time, especially useful in boss fights like Alfred where distance matters.
- Tactic: Tag, retreat, let the poison tick—perfect for hit-and-run.
2. Guns (with Specialized Rounds)
- Use: Situational ranged combat.
- Rounds to consider: Poison, debuff, HP rounds.
- Synergy: Pair with Acid Jet for ranged boss takedowns.
3. Tis Roar (Tiss Rosary Spell)
- Use: AoE burst for slow or stationary mobs/bosses.
- When to use: After poisoning or softening a boss, follow with this to maximize damage while maintaining distance.
Late Mid-Game and Transitioning to Endgame
1. Toxic Storm
- Use: Upgraded form of Acid Jet—a swirling acid tornado that repeatedly hits enemies while poisoning them.
- Why it’s powerful: Traps enemies in a vortex of constant damage and debuff.
- Best against: Slow or mid-speed enemies where they stay in range long enough to be shredded.
2. Aqua Stream
- Use: Multi-purpose shard.
- Travel: Used to navigate underwater before getting Deep Sinker.
- Combat: Great for Inferno Cave enemies due to fire weakness and range.
- Caution: Mana-intensive, so make sure to target wisely.
3. Valefar’s Shard (Valisca)
- Use: Launches ice shards.
- Contextual: Decent against fire enemies but less effective than Aqua Stream due to mana cost and precision.
Bonus Tips and Mechanics
- Reflector Ray Usage: Not just for mirrors. Use it to phase through tight spaces even without reflective surfaces. Many players miss this trick!
- Pair Poison and Range for Bosses: Using Acid Jet or Toxic Storm in conjunction with a firearm lets you maintain safe positioning while wearing down bosses like Alfred. Apply poison, back up, and use enhanced ammo.
- Damage Over Time = Boss Control: Shards like Acid Jet and Toxic Storm are MVPs for managing tough fights. Stack DoT with hit-and-run tactics for stress-free victories.
Final Thoughts
What makes Bloodstained’s shard system so rewarding is how adaptable it is. The game gives you room to experiment, and the effectiveness of a shard depends heavily on how you build around it. These early to mid-game shards give you reliable tools to not only survive, but control fights your way.
If you’re just starting or heading toward the late-game wall, build around your preferred combat style. If you like distance, experiment with poison and guns. If you prefer brawling, lean on AoE shards like Tis Roar or Head Flail. And don’t sleep on the familiars—they might just save your run.
Got a favorite shard I didn’t mention? Feel free to share it with others in the comments. Otherwise, good luck, and melt some bosses.


Leave a comment