“Heavy Lifting” is an aptly named mission in Teardown. It’s one of the more preparation-heavy objectives early in the game, and many players find it frustrating due to the sheer volume of groundwork involved. But with the right setup, some smart equipment use, and methodical clearance, you can streamline the mission and make it far less painful. Here’s how to turn this chaotic mess into a clean, executable plan.
1. Initial Equipment and Dump Truck Positioning
Your first tool is the dump truck. While it might be tempting to use it to smash through buildings right away, it’s not very effective for heavy demolition — especially when dealing with metal components. Instead, you can either leave it at the starting position, park it around the back, or place it somewhere non-obstructive until it’s actually needed later. Don’t waste time trying to clear out structures with it early on; it’s better saved for transporting safes once you’re ready.
2. Bulldozer for Structural Demolition
Head to the far end of the map, where you’ll find a bulldozer and a crane. Start with the bulldozer — it’s your main tool for tearing down the front of the target buildings and scraping away at the ceiling and floors. You’re aiming to expose and free two safes located on the upper levels.
The challenge here is that many of the supports are made of metal, which resists destruction and will block your progress. Make sure to clear out as much debris as possible before moving heavy vehicles into place — metal scraps and barrels can completely stall your operation if not dealt with early.
3. Placing the Dump Truck and Quick Saving
Use the outlines on the ground to properly place the dump truck beneath the furthest safe, which rests on a wooden floor. It’s a good point in your run to quick save, especially since you’ve invested a lot of prep time already.
Inspect the ceiling above that safe — it’s likely made of brick, meaning you’ll need your newly unlocked shotgun to break it. The second safe might rest on a wooden surface, which is easier to destroy but can be inconsistent. For both, it’s important to chip away as much material as possible, ideally reducing the effort to a single well-placed shot.
Remove nearby obstacles like barrels, poles, or leftover metal scraps to prevent safes from bouncing off target or getting stuck.
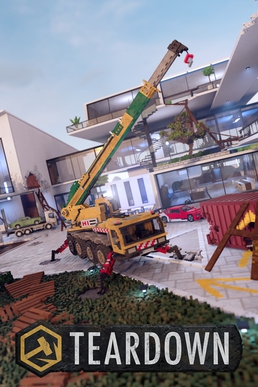
4. Using the Crane to Create a Walkable Ramp
Next, take the crane and use it for more specialized demolition work. You can use it to take out large wall sections if you’d like, but in this guide, it’s better employed as a tool for vertical traversal.
Ram the crane through the side of the building, creating a bridge-like structure into the neighboring wall. The angle should form a walkable ramp leading into the next structure. Be mindful not to remove too much of the floor — you’ll need a platform to stand on.
Camera positioning is essential here. Avoid accidentally smashing mission-critical objects on the other side of the wall, and make sure your walkway is stable. This entry point will become your starting position during the timed section, so test it to ensure it works.
5. More Prep: Bulldozer and the Tree Zone
Take the bulldozer over to the opposite side of the map for more preparation. You’ll find a shed with a box perched just near the edge — carefully demolish the corner wall without knocking the box loose.
Then focus on clearing the fence, walls, and trees in front of this area. Trees are surprisingly problematic, and depending on your route, even a small delay can cost the mission. Blowtorches are not effective here, so go traditional: smash them down or roll over them with the bulldozer.
Also remove any lingering metal scraps or barrels in the vicinity. With time being a precious resource, any object in your path is a potential run-killer.
6. Final Setup and Walkthrough Execution
Once you’ve completed your prep, return to your crane-starting point and quick save again. This will serve as your launch point.
- Begin the mission and immediately drop the first safe into the dump truck. A precise shot should cause the floor to collapse cleanly.
- Move quickly toward the bulldozer. Depending on your weapon loadout and confidence, you might be able to use the hammer instead of a shotgun for more agility.
- Be cautious when placing safes — going too far forward can cause issues. If a drop doesn’t land perfectly, reload from your last save.
- After successfully dropping the safe, reverse or exit as needed. Your newly-cleared tree path will guide you toward the final box and generator.
Make sure your route avoids any steep rock inclines — they can flip your vehicles, wasting valuable time.
7. Final Thoughts and Optimizations
“Heavy Lifting” is one of those missions where every second and every obstacle matters. The safes are weighty, awkward, and prone to getting stuck. The prep is extensive, and while it’s tempting to rush into the timed portion, skipping proper setup will almost always come back to bite you.
- Don’t rely too heavily on vehicles like the dump truck or crane for fast demolition. Their real power lies in positioning and structural manipulation.
- Always quick save before major actions — especially when using explosives or manipulating the safes.
- The crane ramp may need adjusting on repeated runs. Small tweaks can vastly improve ease of access.
With this approach, you’ll save yourself a lot of trial and error — and hopefully some frustration. While the mission takes time to prepare, it’s satisfying once everything clicks into place.
If you were stuck on this mission or had repeated failures due to overlooked steps, this method gives you the edge to execute the heist cleanly and with confidence.
Good luck, and may your safes always land where they’re supposed to!


Leave a comment