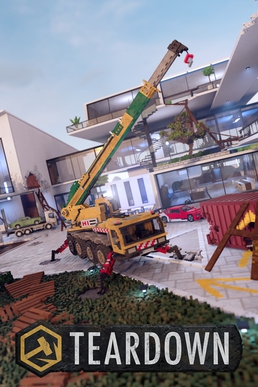
The Flooded Lee Chemicals mission is one of those levels in Teardown that doesn’t immediately click. It feels a bit disjointed — like the map wasn’t quite meant for the path you’re about to take. But with a smart layout, some plank magic, and a little creativity, it becomes a surprisingly efficient and manageable mission. Here’s a breakdown of a reliable and fast setup that balances speed and control, even if the route feels a bit like a patchwork.
1. Truck Positioning at the Start
This mission kicks off with the relocation of a truck from the bottom-left of the map. The goal is to drive it up a dirt incline alongside the dam and use that spot as your starting point.
Now, the truck might fall over as you climb — don’t worry. Whether it lands upright or flipped doesn’t affect the plan. All that matters is that you get it close enough to the dam to support your next moves.
There’s a box just inside the dam — blow a hole in the wall using shotgun shells, pull the box out, and use planks to support it on the dam’s edge near your truck. At this stage, you’re building the flow.
2. Eliminating Walking Time with Smart Pathing
If there’s a theme to this mission, it’s avoiding excessive walking. The dam stretch is slow and tedious on foot, so it’s tempting to see if a vehicle can be driven along it. It’s not required, but if you find a way to do so, it could shave off precious seconds.
On the tower ahead, make a hole, retrieve the box, and lay down planks over the water. When placed from a stable anchor point and draped onto the water, planks float well enough to walk across. This trick forms the core of your traversal through much of the mission.
3. Plank Bridges and Clean Line Progression
You’ll use similar methods in multiple places:
- Bridge gaps with planks.
- Blow holes through building walls to avoid stairs or long internal paths.
- Support entryways for smooth movement.
Another box sits further along — again, blow open access, bridge the gap, and plank it into your route. You’re essentially weaving a zigzagging path that lets you run between objectives without slowdown.
For one of the files boxes, you can use a trick: connect the box to a plank by holding the mouse, placing one end of the plank, picking up the box, and attaching the other end to a stable object. This allows you to suspend the box midair for a quick grab mid-run.
4. Optimizing the Boathouse and Escape
The boathouse area is key to your escape. There’s a slow boat inside the shed, but you should ignore that one. Instead, take a faster boat from earlier in the level and ram it down the waterway, replacing the slow one.
One of the boxes is in a boat — secure it in place with planks next to the speedboat so it’s ready for pickup. When done right, you’ll create a straight line that smashes through trees and obstructions, making your escape smoother.
Just before finishing, you’ll blow a hole through another building, plank the route to your escape, and place the final box nearby. It’s not the prettiest setup, but it works, and once the escape boat is prepped, everything ties together.
5. Running the Route: Fast and Functional
Start at your truck on the dam:
- Grab the first box there.
- Hit the one in the dam through the wall hole.
- Follow the plank paths and hit the boxes in sequence, crossing gaps and water with ease.
- Use the plank-attached midair box for a seamless pickup.
- Continue over the tower planks.
- Leap over the empty boathouse into the speedboat.
- Smash down the final stretch, grab the planked box, and hop into the escape boat.
With decent execution, you should have 10–20 seconds left depending on your route and cleanup. If you can manage to get a car across the dam or integrate faster movement, that number can go even higher.
6. Final Thoughts: Messy but Effective
This mission doesn’t have the natural “flow” of others. It’s not a neat loop or an elegant dance — it’s more like stitching together a jagged line of planks and shortcuts. But that’s okay.
Despite its messy feel, it actually holds up as a solid and simple mission once you’ve got the path mapped. What seems like an awkward layout reveals itself as a chain of manageable segments. There’s no major trick or high-level precision needed — just careful prep and efficient plank placement.
And perhaps most satisfying of all: this mission, despite its clunky feel, can be figured out, set up, and completed in about 10–15 minutes once you know the layout. A great candidate for players wanting a win without excessive trial and error.
Good luck with this low-key but satisfying run. Stick to the path, plank smart, and enjoy the hidden sense of rhythm underneath the surface-level chaos.


Leave a comment