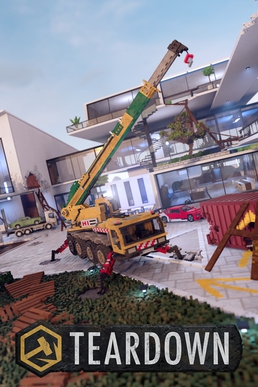
Teardown Part 2 kicks off with a bang — literally — with this first proper heist mission on a brand new map. With eight total targets (including two secondary ones), this level delivers the classic Teardown formula: break in, hack, haul, and escape — all while leaving a trail of debris in your wake.
While this wasn’t a pristine run, it came together on the first successful go, and that’s what Teardown is all about: chaos, problem solving, and creativity. Here’s how the mission was broken down.
1. Starting Point & Route Overview
The route begins at the Boon Restaurant (upper right on the map) and loops clockwise. From a hack near the Jeep, the run immediately sends you flying toward a pink Lambo, then follows a destructible-heavy path across multiple targets, finishing back near your starting zone.
Despite the rough layout, this route allowed for a full run with about 10 seconds to spare.
2. Vehicle Setup: Jeep + Pink Lambo
- The Jeep was salvaged from nearby and used for a short boost in the first few seconds. It’s decent at acceleration but optional.
- The pink Lamborghini (found near the Lambo icon on the map) was positioned as the workhorse.
- Used to ram into a storefront, which was pre-cleared with pipe bombs and some shotgun blasts.
- Leaf blower was key for cleaning debris and ensuring a smooth jump.
3. Interior Plank Routing and Target Collection
Inside the mall-like interior:
- The Lambo smashes through a wall directly into a target pickup zone.
- From there:
- A hole in the ceiling was cleared.
- A plank goes over the escalator.
- The walkway was slightly edited to allow easier movement.
Escalating to upper levels:
- One target was dangling originally, but instead of dropping from above, it was repositioned within reach.
- Several rooms were blown open with bombs, turning the once compartmentalized building into a rapid sprint zone.
- Planks were used for quick vertical ascension.
4. Chaos in the Middle – Controlled Demolition
As the run progresses:
- Multiple walls and ceilings are destroyed.
- A shotgun was used where available; once out of shells, the rocket launcher finished the job.
- Debris was kept to a minimum where possible — but some rooms were pure chaos.
This part of the route featured creative repurposing:
- Sofas used as jump-offs.
- Partial floors blown out and repositioned targets dragged into optimal spots.
5. Final Targets and Escape
- One target is reached after dropping through a plank pathway.
- Another sits inside a room that was heavily bombed out and left open.
- Final leg is a sprint through the corridor toward the Escape Vehicle.
Despite the carnage, the loop is tight. Once rehearsed, the run can be done with 10+ seconds remaining, which is comfortable by Teardown standards.
6. Live Run Summary
The run goes:
- Hack container, jump into Jeep.
- Speed to Lambo.
- Smash storefront, grab target.
- Use planks over escalator.
- Scale rooms via holes and debris.
- Drop and collect in sequence.
- Loop back via customized hallways.
- Grab final targets and reach the van.
Final Notes
- Leaf blower is a godsend — use it to clear clutter fast.
- Quick save just before the run starts.
- Optimize jump angles by making plank bottoms wider.
- You can do some actions faster (like climbing instead of dropping) — but it’s not essential.
This is a classic Teardown mission: messy, dynamic, and deeply satisfying when it works. First time through, it took around 41 minutes including planning and messing about, but now it runs smooth.
Have fun, and remember — if it works, it doesn’t have to be pretty!


Leave a comment