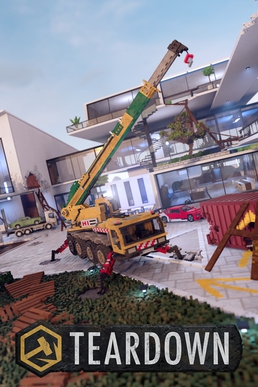
The GPS Device mission at West Point Marina is a step up in difficulty and precision, but once you settle on a route and understand the tools, it becomes a smooth and repeatable heist. There are multiple stages to optimize, and a few pitfalls to avoid that can cost you time or ruin your run.
This guide breaks it down, stage by stage, with a clean, practical strategy to collect all your objectives efficiently.
1. Clearing the Path with the Bulldozer Vehicle
Start by hopping into the nearby construction vehicle and clearing out the entire route to the far end of the docks. This heavy vehicle is slow, but important for removing fencing, barrels, and small obstacles.
Be cautious:
- Avoid hitting the pipeline — damage here will spill contents across the road and create chaos.
- Don’t drag metal crates or signs; they’ll clog your path during the heist.
When approaching the vehicle you’ll later drive into the van, make sure the back of the boat is clear — don’t smash it or block its entrance.
2. Using the Crane to Retrieve the Boat
Next, take control of the crane and lower the hook by holding right-click for about half a second. Start tearing down the roof above the boat — go for opposite corners to loosen it evenly.
- Once loosened, drop the hook and grab the boat.
- If the boat doesn’t budge, remove wall supports or use the blowtorch.
Pull the boat backward out of the building. This can be finicky:
- Keep the boat upright as much as possible.
- If it flips, use the blowtorch to open a hatch so you can still retrieve the objective.
After pulling it clear, quick save. Getting the boat into place can be tedious, and you’ll want a fallback.
3. Preparing Your Boat-to-Boat Transfers
You’ll be jumping across boats to speed through the heist. There are different methods here:
- Pipeline route: Possible but time-consuming.
- Crane-based path: Slightly more complex.
- Smash method: Fastest.
Use the truck parked near the dock. Reverse it down the ramp and angle it to smash the moored boat at the corner — this frees it from its ties and sets it in motion.
Be careful:
- Reverse carefully — straight reversing will sink the truck.
- Hit the corner of the boat to send it drifting where you need it.
4. Repositioning the Boat for Fast Access
Instead of ferrying it far left and wasting time, drive the boat around the corner and intentionally lodge it inside the right-hand dock (top of the map). This keeps it stable and closer to the building with your next objective.
Frame rate might dip due to physics, but as long as the boat holds position, you’re fine. The closer to the front door it’s wedged, the better.
5. Building Infiltration and Vehicle Placement
Climb up to the objective room (upstairs, through a wall). There’s also a collectible here on the bottom floor.
- Break through the window.
- Drop to the bush below.
- Shotgun the base of the wall to make a clean entry.
Exit out the front door (blast it open) and find a small car parked nearby. Reverse it against the wall for your upcoming jump.
6. Final Pre-Heist Prep
This is your last chance to quick save.
- Set the boat in its final position.
- Clear fences or obstructions you’ll pass through.
- Open doors and make sure your route has zero delay points.
7. Executing the Heist
Step-by-Step:
- Jump off the back ledge and land on your boat.
- Drive straight across to the building.
- Enter via your cleared window, grab the objective.
- Jump in the parked car, drive through to the next dock.
- Grab the second GPS device.
- Enter the next boat.
- Drive straight into the wooden dock area.
- Exit the boat, grab the third GPS device.
- Enter the final van and finish the mission.
If all has gone smoothly, you should have 5–10 seconds to spare, with room for optimization.
Final Thoughts
This GPS mission is less about brute force and more about clean setups, fast movement, and knowing when to use vehicles versus cutting across terrain.
The key to success lies in:
- Proper crane handling.
- Smart boat positioning.
- Efficient window and wall demolition.
It might feel like a mess on your first go, but with a couple of attempts, the route becomes second nature. You’ll start appreciating just how fine-tuned the mission design really is.
Good luck!


Leave a comment