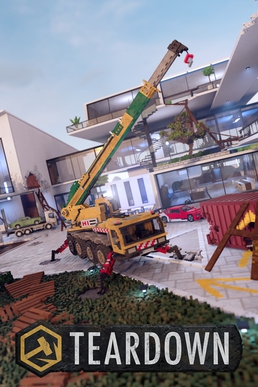
Insurance Fraud isn’t just the toughest mission in Teardown Part One — it’s arguably one of the most technically demanding challenges in the entire game. With a one-minute timer and multiple vehicles to deliver, you are asked to pull off a logistical miracle.
Success hinges entirely on one word: optimization.
This guide covers the complete process — prep, routing, execution — and provides critical insight on how to make it through this gauntlet of a mission without losing your sanity. No fluff here, just raw tactics.
1. The Route and Core Concept
You must deliver six vehicles to a drop zone within a tight one-minute window. The execution depends entirely on prepping every single vehicle path and clearing all obstructions down to the grass.
Here’s your basic structure:
- Car 1: Top of the ramped scaffolding — launch into the trailer.
- Car 2: Yellow car near the center — smash through into the same trailer.
- Cars 3 and 4: Red and green sports cars from distant rooftops — delivered using cranes and planks.
- Car 5: Jeep — aligned to hit the elevator shaft.
- Car 6: Lamborghini — precision-dropped from above.
That’s your six. Now comes the work.
2. Car 1: The Starting Point Setup
Place wooden planks along the ramp, clear out fences, pillars, and especially the glass and metal rails — they’ll absolutely ruin your run. Paint a yellow line to guide your steering.
- Grass removal is non-negotiable. The car won’t budge otherwise.
- Use your shotgun to take out ceiling debris.
- Drop the car into the trailer. You’ll jump out mid-launch and transition to the next car.
3. Car 2: The Yellow Speedster
From the marker area, blast a clean hole through the building. Avoid using bombs to preserve floor integrity. Use your shotgun and sledgehammer instead.
- Get rid of ropes, bollards, grass, and clutter.
- Line up the launch directly into the trailer — this is your second car.
- You’ll now have two vehicles in.
4. Cars 3 & 4: Crane Transport Vehicles
Use the crane to bring in the red sedan and green Mustang-style car from rooftops.
- Plank the cars first for stability.
- Drag them into position — ideally right next to the drop zone.
- These vehicles are already placed pre-run, so make sure they’re lined up and in reverse-ready positions.
For detailed placement instructions and crane setup, check linked video references if needed.
5. Car 5: Jeep + Elevator Shot
Use the jeep’s ruggedness to your advantage:
- Paint a guide line.
- Use shotgun blasts to carve a clean rectangle into the elevator shaft.
- Leave a small ledge intact to keep the jeep in place.
On the run, get in, drive it across your painted line, and drop it straight into the elevator shaft — no corrections needed.
6. Car 6: The Lamborghini Launch
This is where runs die. The Lambo doesn’t handle well. It needs a perfect drop to land cleanly.
- Go up the elevator, shotgun the entire platform surrounding the Lambo.
- Leave only a small strut to hold it.
- Underneath, place debris and planks to cushion its fall.
- Use a pistol to shoot the strut, let it fall, and test it. Adjust and save once it drops cleanly.
Any clipping, debris, or bad angle will lock the Lambo in place. Test this relentlessly before the final run.
7. The Final Run – What It Looks Like
- Car 1: Start at the scaffolding ramp, launch into the trailer.
- Car 2: Hop out mid-run, enter the yellow car, drive into trailer.
- Cars 3 & 4: Drive red and green cars into position.
- Car 5: Jeep crosses the map and drops into the elevator.
- Car 6: Shoot strut, Lambo falls, jump in, drive it to finish.
You must do this under one minute, and that’s only possible if:
- The grass is fully removed.
- The vehicle paths are completely clear.
- Your driving lines are precisely lined up.
Even a second of hesitation — a wheel snag, a missed drop, a mistimed turn — can destroy your run.
8. Tips and Final Advice
- Destroy the grass. It’s tempting to skip it. Don’t. It will waste more time than it saves.
- Preload ramps and planks to ease movement.
- Use visual guides (spray paint lines) to align launches.
- Test every drop, especially the Lambo.
- Quick save at every prep phase. You’ll need to reload often.
Even with everything optimized, expect to retry several times. There’s too much randomness — collisions, drops, timing — to expect a first-run success.
This mission is about painstaking precision. If you’re struggling, it’s not you — it’s just the sheer difficulty.
Final Thoughts
Insurance Fraud is a cruel but brilliant puzzle. It takes every lesson you’ve learned and throws it at you under pressure. Once completed, it’s an accomplishment worth celebrating.
If you need help with crane lifting techniques or detailed drop placement, refer to community video guides and walkthroughs — even the smallest detail can make the difference.
And seriously — destroy the grass.
Good luck. You’ll need it.


Leave a comment