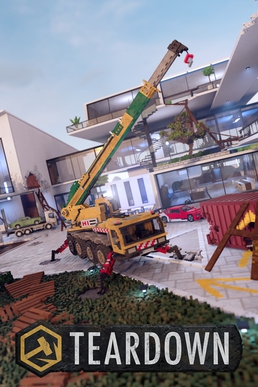
The “Classic Cars” mission on the Lee Chemicals map is the first real test of your planning skills in Teardown. It’s not just about blowing things up — it’s about how and when you move. You’re tasked with stealing multiple cars, some of which are awkwardly placed, and pulling off the optional objectives along the way. It’s a fun and clever puzzle once you break it down, and this guide walks you through a smart, smooth approach.
1. The Boat Bridge Smash: Setting Up Your First Car Theft
Start off by heading left in your van. While you can take a side route around the water, the main path is more consistent and a bit quicker. Your first move is to hijack the big boat — one of the cars is on it. Drive it carefully but confidently and pull off a sharp turnaround. Don’t stress about damaging the boat; you’re only using it to crash backward into the bridge.
This backward smash breaks open a crossing point and lines you up for a clean exit. The bridge is cleverly reinforced with a metal sheet, allowing a smoother vehicle transition. It’s a well-designed piece of the level, and you should use that to your advantage. Quick save here to avoid repeating this setup.
2. Clearing Gates and Making Way
After that, grab another vehicle — a van nearby works well — and plow through the gates. You’re not just opening the path for yourself but also clearing the way for the other car you’ll need to drive through later. This saves hassle and prevents unexpected crashes during the timed segment.
Be careful when navigating through the gate area: try not to hit the truck or stack of boxes nearby. If you’re forced to choose, the boxes are a better hit than the truck.
3. The Flatbed Car Dilemma
Inside the next area, you’ll find a car sitting on the back of a flatbed truck. This one’s tricky. Early in the mission, your equipment isn’t sufficient to destroy the metal bars holding it in place. You could spend time trying, but it’s better to work with what you’ve got.
Start by moving barrels and clutter out of the way now — it’ll save you time later. Note that reversing the car off the flatbed is nearly impossible without causing issues, so instead, plan to move the whole truck or clear a drop-off path.
Be cautious during this part — if you accidentally trigger the heist alarm by touching the objective marker too soon, you’ll ruin the setup. Quick save before you get too close.
4. Prepping the House and Clearing Paths
Next, it’s time to prep your final car and plan your escape. Head to the building on the right and carefully reverse a car into position — but not too far, or you’ll hit the support beam and risk getting tangled in wires or debris.
Inside the building, it’s wise to create a hole through the wall near the bottom of the stairs to improve your final run. This small change can shave crucial seconds. Smash out any obstacles in your way, especially anything along the route to or from the stairs.
If you feel inclined, you can clean up other corners of the room to improve maneuverability, but don’t overdo it. You only need a clear line — not total destruction.
5. Choosing the Right Boat for the Job
The nearby boat on the right may look appealing, but it’s painfully slow. Don’t waste time even moving it. Instead, take the faster boat — something more akin to a speedboat — and drive it to the dock area. You’ll need to make a tight reverse and park it for your quick getaway later.
Don’t try to jump up from the boat directly; it’s not going to work. You’ll need to create a pathway via interior stairs or cleared walls.
6. Breaking into the Office and Lining Up the Route
Head into the office next. Smash boxes, break windows, and make space for an uninterrupted run. Remember, anything that slows you down is a liability. Once that’s done, your escape line should now connect the boat, the stairs, the office, and the car.
Position all vehicles, clear your path, and prepare to launch the mission. Quick save before triggering the alarm.
7. Executing the Heist: A Clean Run
- Start by jumping straight into the speedboat.
- Race across the water — avoid hitting the left-side jetty, which can bleed off crucial momentum.
- Dash into the prepared gap in the building wall and up the stairs.
- Hop into the first car and drive it out. When you hit the drop zone, you can safely exit — you don’t need to remain inside the vehicle.
- Immediately switch to your next car — the one backed into position earlier — and reverse it out.
If everything’s gone according to plan, you should have about 20 seconds left, which is a solid buffer.
8. Optimizations and Lessons Learned
This mission may seem daunting at first, but as you piece together the sequence, it starts to make perfect sense. Your main job is to connect all the objectives, ensure smooth transitions, and avoid mistakes like blocking vehicles or triggering alarms prematurely.
Remember:
- Breaking through gates early saves frustration later.
- Use quick saves generously.
- Always test your boat and car paths before committing.
Teardown really shines in moments like this. Even though it’s a sandbox with heavy physics, the logic and intent behind its levels are incredibly well-crafted. There’s just enough flexibility to let you improvise, but the solutions feel deliberate and rewarding.
If this was a frustrating mission at first, hopefully, this strategy helps it click for you. Once it does, it becomes one of the most satisfying missions to master.
Happy heisting, and don’t forget — it’s not about how hard you crash, it’s about how smart you set it up.


Leave a comment