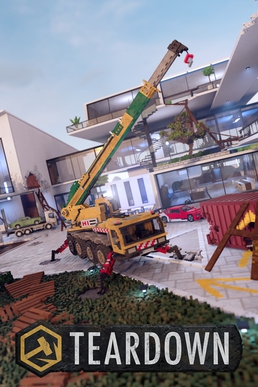
Welcome to the first mission on Teardown’s new tropical map — a visually vibrant and mechanically punishing level where you’re stripped of all your usual tools. That’s right: no sledgehammer, no blowtorch, no planks. Everything must be salvaged.
But don’t let that scare you. This mission is tight, yes — and optimizing your approach will make or break your success. But it’s also incredibly satisfying to solve with found tools, resourceful routing, and a little ingenuity. Here’s how to get through it cleanly.
1. General Mission Structure
- You must hack four primary targets.
- One specific target (highlighted in yellow) must be hacked last — this is your final objective, not an escape boat.
- Optional items can be collected along the way, but the mission ends upon hacking the final terminal.
Your tools, including ladders, planks, and vehicles, are scattered across the map. Most can be found in boxes near blocked buildings or guard towers.
Turrets and equipment can be used tactically, and boxes often contain gear like pipe bombs, shotguns, or planks. Always explore early to stock up.
2. Target Order & Movement Plan
The most efficient route with minimal effort follows this pattern:
- Jungle Lab (bottom left of the map)
- South Guard Tower
- Radio Tower (island structure)
- Communication Station (your final hack)
3. Jungle Lab Start – Tight Movement and Door Demolition
The Jungle Lab is heavily fortified. While the most straightforward option is to blast the door with pipe bombs, you can also just shoot off the hinges to conserve explosives.
- Ladder needed for roof access can be salvaged from the nearby watchtower.
- Ladders are easier to place from above — they get floppy and unstable if dragged from the bottom.
Set up ladder routes:
- First ladder to get on the roof.
- Second to bridge the gap and access the dish.
The satellite dish on top can be shot down using a rocket launcher or turret.
4. Turrets & Tool Use
Turrets are controllable using WASD (not your mouse). Use them to destroy walls, dishes, or supports.
If you’re short on firepower:
- Turrets = demolition tools.
- Rocket launcher = fast utility for toppling structures.
Be mindful of ammo. Ladders and environmental planning are often more valuable than brute force.
5. Boat Jump and Improvised Structures
You’ll be using a tugboat to bridge the water gap. Aim to park the boat just left of the central water channel, aligned with your planks.
- Place 2–3 planks to span the boat.
- Use the momentum from a forward-running door to get up the slope.
Use a ladder from the upper guard tower to scale the far side.
A vehicle retrieved from a warehouse (cursor marked area on map) should be parked as your transition vehicle to the next zone.
Set up:
- Drive vehicle from warehouse to ramp.
- Use it to jump over debris and guard tower.
- Add a ladder or plank for clean entry.
6. Radio Tower & Boat Launch Setup
Smash the wooden supports of the tower using explosives.
- Let the tower fall into position as a bridge.
- Use more planks or floating debris if necessary.
The boat must be driven into position manually, then ladder access placed from the nearby water tower.
Take note:
- This section eats up time fast.
- Place ramps and walkways carefully, and avoid over-engineering.
7. Final Hack at the Communications Station
From your last boat:
- Climb the path leading to the building.
- Clear branches and side debris with a shotgun.
- Smash a hole in the building to make a direct route.
- Use a salvaged ladder from nearby to shortcut into the upper floor.
Once inside:
- Pipe bomb or shotgun out interior walls for faster traversal.
- Don’t worry about structural collapse — metal core supports keep the building upright.
This is your final hack point, not a standard escape. You’ll end the mission here.
8. Execution and Live Run Tips
- It’s tight. Expect to finish with 5–10 seconds remaining.
- You may need to retry a few times depending on your ladder placement.
Key tips:
- Cut trees that obstruct your sprint lines.
- Always walk into vehicles, don’t jump.
- Use WASD to control turrets, not your mouse.
Optional: Place buffer vehicles (like guard tower wreckage) to protect boats from being nudged off-course.
9. Toolboxes and Salvage Locations
- Toolboxes appear in blocked buildings — look for those with sealed doors.
- Use explosives or turrets to gain access.
- You’ll find ladders, rockets, ammo, and more.
Explore thoroughly. You’re not supposed to complete this on your first go.
Final Thoughts
This mission forces you to think differently. You’re stripped of convenience and forced into engineering mode — building, balancing, and planning ahead.
But there’s something extremely satisfying about it. Once your ladders are placed, your planks are lined up, and your vehicles are ready — it feels like a chaotic machine clicking into place.
Give yourself the time to prep, and remember: if a plank wobbles, a ladder flops, or a boat floats out of place, you probably threw it in the water like I did.
Good luck!


Leave a comment