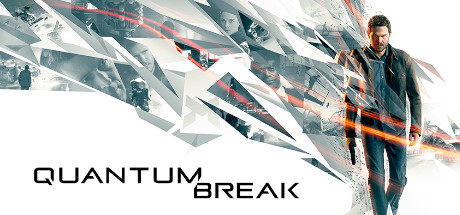
The final boss fight in Quantum Break is a challenge that has tripped up many players, especially those diving into the game’s hardest difficulty. The battle mechanics are subtly layered, and unfortunately, the game doesn’t do a great job of communicating the critical elements you need to understand in order to survive. In this guide, I’ll walk you through the essential strategies, weapon recommendations, and ability usage that will help you take down Paul Serene, even on Hard. If you’re here because you’ve been getting destroyed without knowing why, you’re not alone—and you’re in the right place.
Weapon Choice: What to Bring, and What to Settle For
If you’re stuck with what’s lying around the arena, the assault rifle and semi-automatic shotgun are your best options. They aren’t ideal, but they’re serviceable. If you do have the option to prep your loadout ahead of the boss fight, prioritize the advanced SMG and the light carbine rifle. These two weapons will make the entire sequence significantly easier. The light carbine in particular excels at ranged engagements, allowing you to safely pick off enemies from across the area without much threat of return fire.
During the fight, once you down an enemy, immediately swap your assault rifle for a tactical SMG. While not as powerful as the advanced SMG, it’s a step up in effectiveness compared to the default rifle, particularly in terms of accuracy and damage-per-bullet output.
Understanding the Boss Mechanics
The biggest hurdle for most players is a lack of clarity around what’s actually happening during the boss fight. Paul Serene is not a traditional boss with a health bar. Instead, the encounter is structured around wave management, timed energy attacks, and brief opportunity windows. Damage dealt outside of those windows won’t matter, so it’s more about survival and timing than output.
Serene is invulnerable while he floats above the arena, periodically tossing cronon grenades—these are small, glowing orbs that function like proximity mines. If you’re caught in their blast radius, it’s an instant death. They’re deadly, but their range is limited. Your first priority in each phase is to stay mobile and avoid these time-based explosives.
Positioning: Stay Smart, Stay Safe
A highly effective strategy is to hug the back of the pool area where you begin the encounter. This position limits the number of enemies that can swarm you at once and gives you visibility and time to react. The light carbine shines here, letting you thin the herd before they reach you.
Wave 1 begins with standard Monarch troops. Keep your Time Rush and Time Dodge handy, using them to escape danger or flank enemies. Once the wave ends, Serene initiates a giant energy attack. This is likely where many players die without understanding what hit them—it’s a huge area-of-effect blast that can take out 60% of the arena if you’re not prepared.
Surviving the Second Wave and Beyond
After surviving Serene’s first attack and shooting him to begin phase two, a second wave of enemies will spawn. This is where things escalate. You’ll be dealing with heavier enemies, more pressure, and less margin for error. Try not to remain in the middle of the arena. Though it’s tempting to stay aggressive, you’re far more exposed. Instead, prioritize movement, use your Shield to buy time when overwhelmed, and continue repositioning with Time Rush.
Enemies in orange suits are a special threat. Let them rush you if needed, but always watch out for Serene’s grenades. Time Stop is largely ineffective in this encounter, so focus on what works: movement, dodging, and melee attacks during Time Rush, which can take out enemies in quick bursts. Just remember: getting caught in a grenade blast while meleeing will still kill you instantly.
Boss Damage Windows
There are no health bars here. You only damage Serene at very specific moments: after each wave, when he becomes briefly vulnerable. After Wave 1, you’ll shoot him once. He will then retreat and spawn another wave. After Wave 2, you’ll dodge a sequence of three large energy blasts. Successfully surviving this sequence will make Serene drain his own energy, leaving him open. Shoot him once more, and the fight ends.
You’re not trying to whittle him down over time. It’s all about surviving, avoiding his traps, and striking at the right moment. Trying to play it like a traditional DPS-heavy boss fight will just get you killed.
Quick Recap of Key Tips:
- Best Weapons: Advanced SMG + Light Carbine (bring them if you can).
- Fallback Weapons: Tactical SMG (swap to it early) + semi-auto shotgun.
- Stay at the Back: Use the rear of the pool to limit enemy line-of-sight.
- Ability Management: Prioritize Time Rush and Shield; forget Time Stop.
- Avoid Cronon Grenades: Small blast radius but instant death—dodge constantly.
- Serene is invulnerable until post-wave moments—don’t waste bullets.
- Trigger each phase by surviving the waves and dodging Serene’s bombs.
Final Notes
Finish the second wave at the back of the pool, so when the bombs hit, you can sprint forward safely and hit Serene when his shield drops. Don’t let yourself get stuck in a corner—mobility is everything here.
Once you’ve completed the encounter on Hard using your time powers, you’ll unlock the Time Lord achievement. Congrats on surviving one of the trickiest fights in Quantum Break!
Thanks for checking out the guide—and special shoutout to the supporters on Patreon and everyone helping make content like this possible. See you in the next one!


Leave a comment